tiling
Bathroom Wall Tiles Around Doors and Windows
Choose the tile height, measure each bathroom wall in feet, deduct openings and check the tile boxes before ordering.
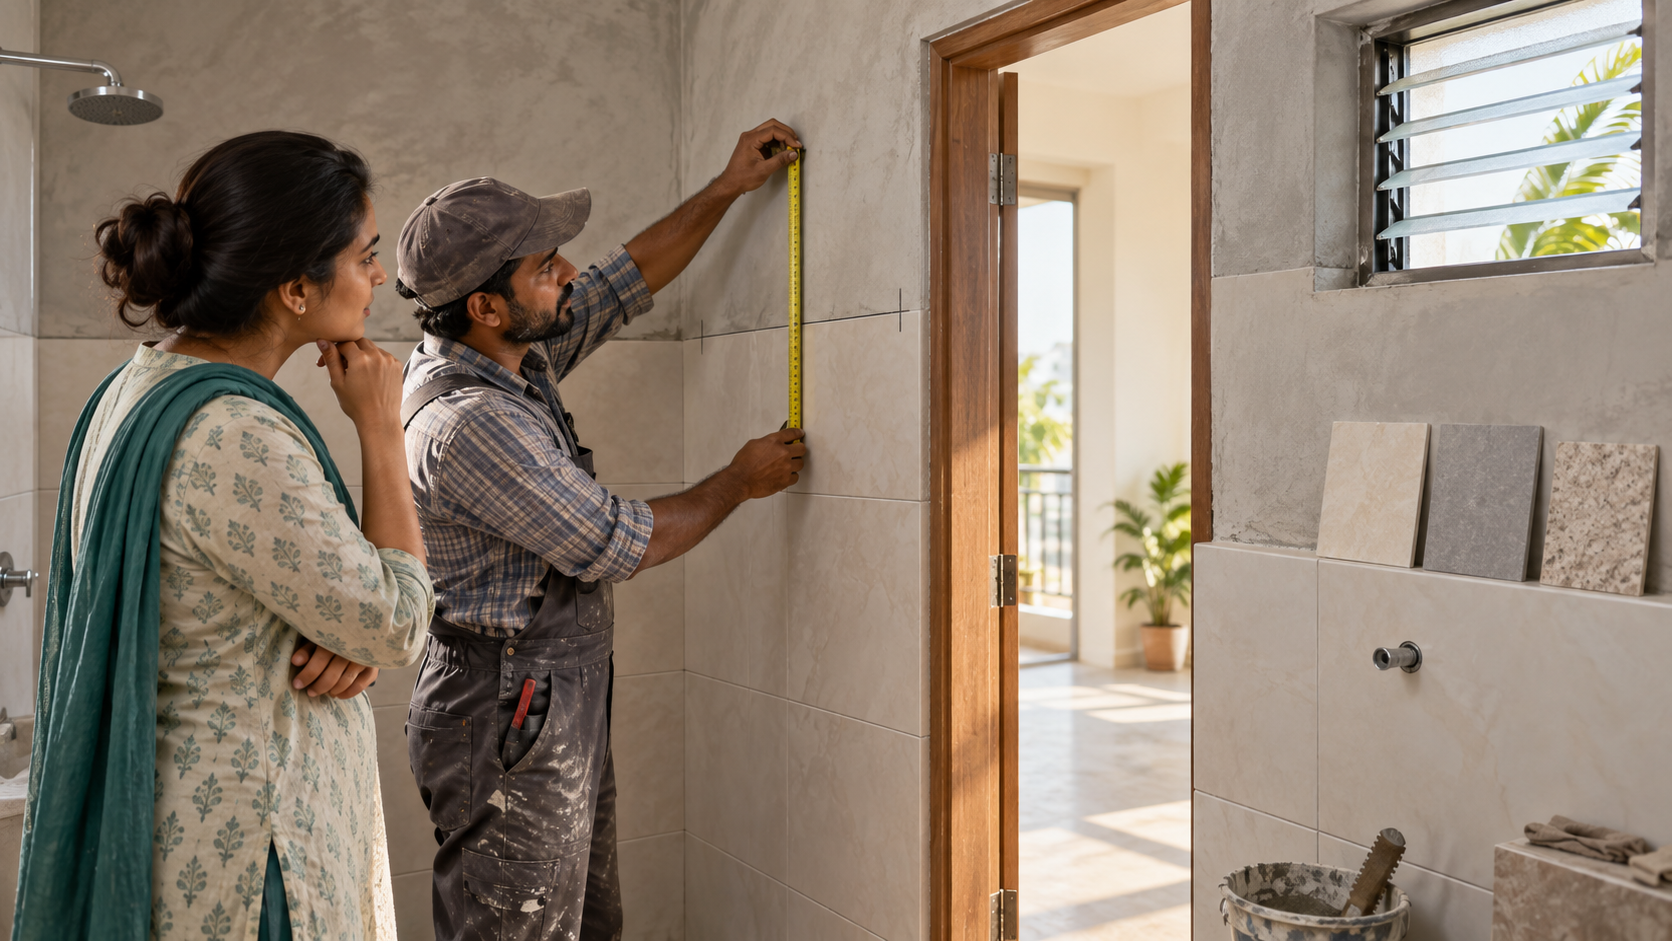
In a small Indian flat, the bathroom may have a full-height tiled shower wall, a lower tiled band behind the basin and a narrow ventilator above the door. If you give the tile shop the bathroom's floor size, it still cannot know how many wall tiles to send. First decide where the tile stops. Then measure the parts of the walls that will actually receive it.
Imagine you and the tiler have marked a line 7 ft above the finished floor. We will follow one 10 ft wall with a door, then show how to repeat the job around the room. The example uses a 1×1.5 ft tile and a stated carton count only to make the arithmetic visible. Your selected tile and layout decide the real order.
Agree on the finish line while you can see the wall
Stand in the bathroom and mark the proposed tile height on each wall. Is it 7 ft everywhere, or does the shower wall reach the ceiling? Will a different tile go behind the basin? Mark a niche, a window ledge and any exposed door sides that the tiler plans to cover. A single “bathroom wall area” hides all of these choices.
For our first wall, the tiled band is 10 ft wide and 7 ft high. The flat area before openings is 10 × 7 = 70 sq ft. Suppose the door is 2.5 ft wide and passes through the full 7 ft band. Its opening takes 2.5 × 7 = 17.5 sq ft. The wall face that remains is 70 − 17.5 = 52.5 sq ft.
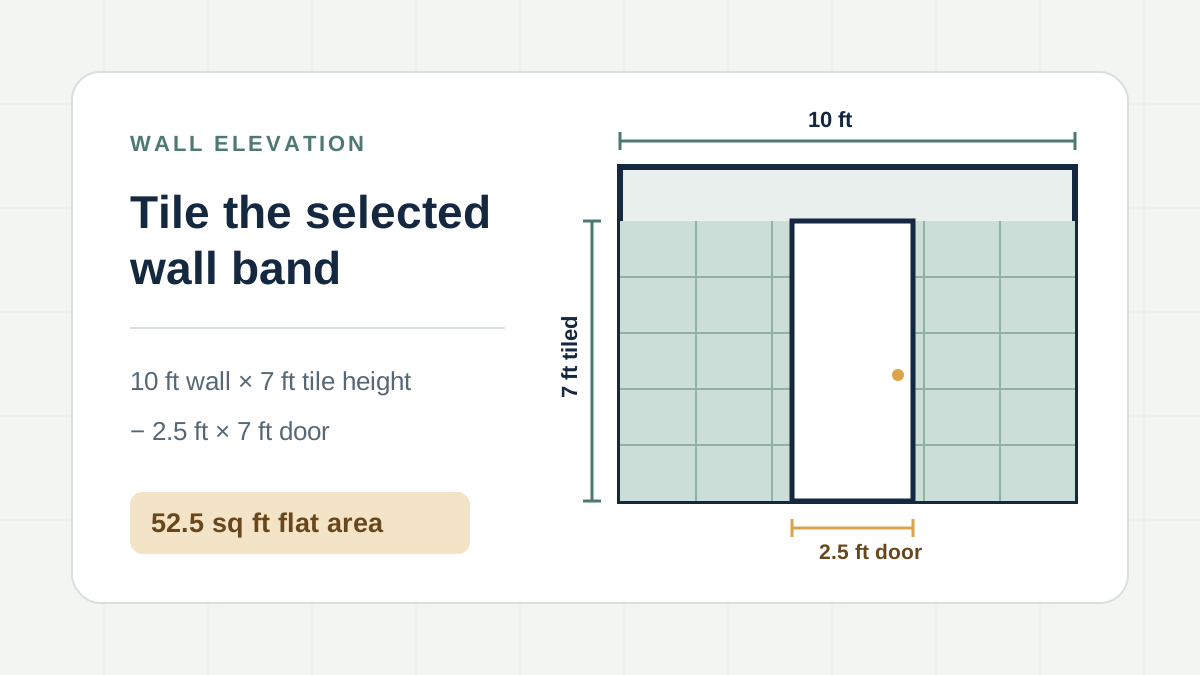
Notice the word flat. We have removed the opening from the wall face; we have not measured the side faces inside the doorway. If the tiler is returning tile into those reveals, measure their widths and heights separately and add them. The door frame itself is not a tiled surface. The same care applies to a niche: the opening removes some flat area, but its back and sides may add area if they will be tiled.
Walk around the other walls without double-counting
A ventilator is easy to mishandle. If it sits entirely above the 7 ft tile line, it changes nothing in this example. If it overlaps the band, deduct only the part inside the selected tiled height. For instance, a 2 ft wide ventilator with just 1 ft of height inside the band removes 2 × 1 = 2 sq ft from that wall, not its full opening area. If its sill and sides are to be tiled, add those small faces separately.
Use a note for each wall: width, chosen tile height, openings overlapping that height, and any returns. Add the finished wall totals only after each is checked. This also helps if one wall gets a feature tile and the others get a plain tile. They need separate orders even when they share the same bathroom. The floor is another line entirely; it is not found by multiplying the wall perimeter by tile height.
Suppose the door wall also has a ventilator with 2 sq ft actually inside the tiled band. Its flat tiled area would fall from 52.5 to 50.5 sq ft. Under the same 10% allowance and 1.5 sq ft tile, 50.5 × 1.10 ÷ 1.5 ≈ 37.03, so you would calculate 38 tiles. That still rounds to seven six-tile boxes. The opening changes the area and the piece count, even when it does not change the number of cartons you pay for. The spare pieces within those cartons are not a reason to ignore the ventilator on the measurement sheet.
A short measurement note can be as useful as a drawing:
| Example: the door wall only | Working | Area |
|---|---|---|
| Chosen tiled band | 10 × 7 | 70 sq ft |
| Door inside that band | 2.5 × 7 | 17.5 sq ft |
| Flat wall left to tile | 70 − 17.5 | 52.5 sq ft |
Before buying, ask the tiler whether the finished tile height is measured from the finished floor. If floor build-up changes after the wall is marked, the bottom and top cuts may change. Confirming the finish line is more useful than adding an unexplained extra box later.
Move from square feet to the carton count
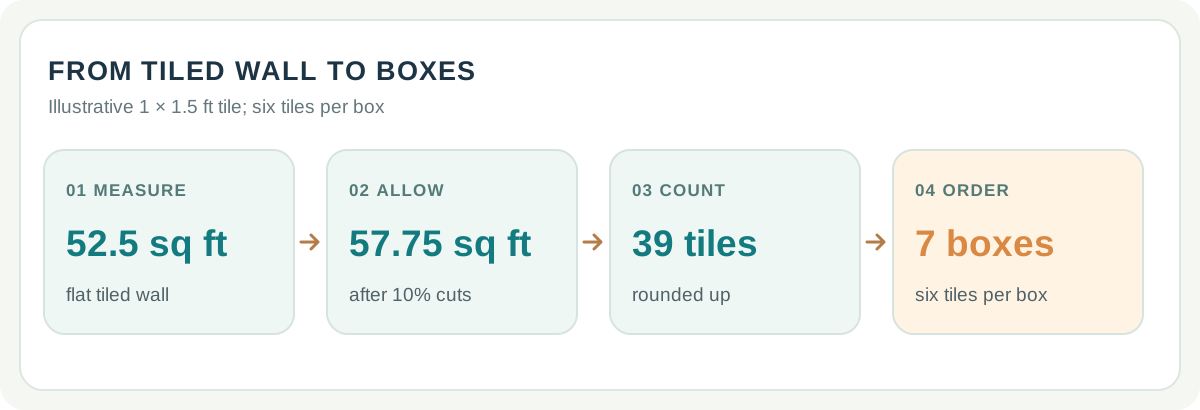
Suppose the chosen wall tile measures 1 ft × 1.5 ft. One tile covers 1.5 sq ft. Give this example an illustrative 10% cutting allowance: 52.5 × 1.10 = 57.75 sq ft. Divide by one tile's area: 57.75 ÷ 1.5 = 38.5, so allow 39 whole tiles.
If the selected carton holds six tiles, 39 ÷ 6 = 6.5, which rounds up to seven boxes. Seven boxes deliver 42 tiles. The three pieces above the calculated 39 are the result of full-box ordering, not a second cutting allowance.
A bathroom with many corners, pipe cuts, a decorative border or a directional pattern may need a different allowance. Discuss the setting-out with the tiler. Also check whether that 1×1.5 ft size describes the tile you are actually purchasing and whether the shop counts six pieces per box. Some cartons state a covered area; use the product's own box details rather than the example above.
One more site detail can change the order: the tile line may turn across the shower wall at full height. If that wall is 10 ft wide and the ceiling is 9 ft above the finished floor, taking its tile from 7 ft to 9 ft adds 10 × 2 = 20 sq ft before any openings. Calculate that extra band for the shower-wall tile, with its own cut allowance. Do not quietly apply the seven-box door-wall example to a bathroom where the selected height varies from wall to wall.
Take a complete scope to the tiler and the shop
The tile order tells you how much of this tile to buy for this wall. It does not include floor tiles, adhesive, grout, trims, waterproofing work or labour. Ask the tiler to write down which of those are in the quote and who supplies them. Around a doorway, check whether a metal or other edge trim is planned, whether reveals are tiled and whether the tile ends at the frame or continues to another face.
At the shop, check shade or batch, carton count, delivery and replacement terms. If different wall sections use different products, keep their boxes separate on the invoice. A spare tile for a later repair can be useful, but decide on it explicitly instead of assuming the three carton-rounding pieces will stay uncut and intact.
The Bathroom Tile Calculator helps apply product details and rates to a saved measured layout; the Wall Tile Calculator covers the same type of wall decision outside a bathroom. If you also need the bathroom floor, measure it as its own shape and follow the floor tile guide from floor area to boxes. Keeping those surfaces separate makes the final quote much easier to understand.